Spring Boot + React 프로젝트를 NCP를 사용해서 서버에 올리기
1- 연습 Project 생성
project : NCPSpringBootReatGradle
type : Gradle
Available : Spring Boot DevTools, Lombok, Spring Web
spring boot project에 Docker 파일 생성
프로젝트에서 우클릭 – new – file – Dockerfile 생성
NCPSpringBootPrject/src/Dockerfile에 생성된다.
Dockerfile
FROM openjdk:17
ARG JAR_FILE=build/libs/NCPSpringBootReactGradle-0.0.1-SANPSHOT.jar
COPY ${JAR_FILE} app.jar
ENTRYPOINT ["java","-jar","app,jar"]
Gradle를 이용해서 프로젝트 빌드하기
배포를 위해 하나의 jar 파일 혹은 패키지로 빌드해야한다.
SpringBoot 프로젝트와 React 프로젝트가 하나의 패키지가 될 수 있는 build 구성이 완료된다.
설정한 build.gradle의 내용은 SpringBoot 프로젝트가 build 될 때 React 프로젝트를 먼저 build 하고 결과물을 SpringBoot 프로젝트 build 결과물에 포함시킨다는 스크립트이다.
Gradle을 이용해 프로젝트를 build 하는 경우 task가 서로 의존 관계를 가지기 때문에 processResources를 기점으로 installReact > buildReact > copyReactBuildFiles 순으로 실행이 된다.
2- 연습 React 생성
\Spring Boot\workspace\NCPSpringBootReactGradle\src\main 위치에 react 생성
PS D:\Spring Boot\workspace\NCPSpringBootReactGradle\src\main> npx create-react-app frontreact
VSCode에서 App.js 수정
import React from 'react';

const App = () => {
  return (
    <div>
      <h1>Spring Boot + React + NCP</h1>
      <h3>카운트 : 1</h3>
      <img src="./image/망그러진 곰.png" alt="망그러진곰" />
    </div>
  );
};

export default App;
3- NCP Server 생성
bitcamp-jenkins
bitcamp-springboot
Server 생성
서버 : bitcamp-jenkins
1.
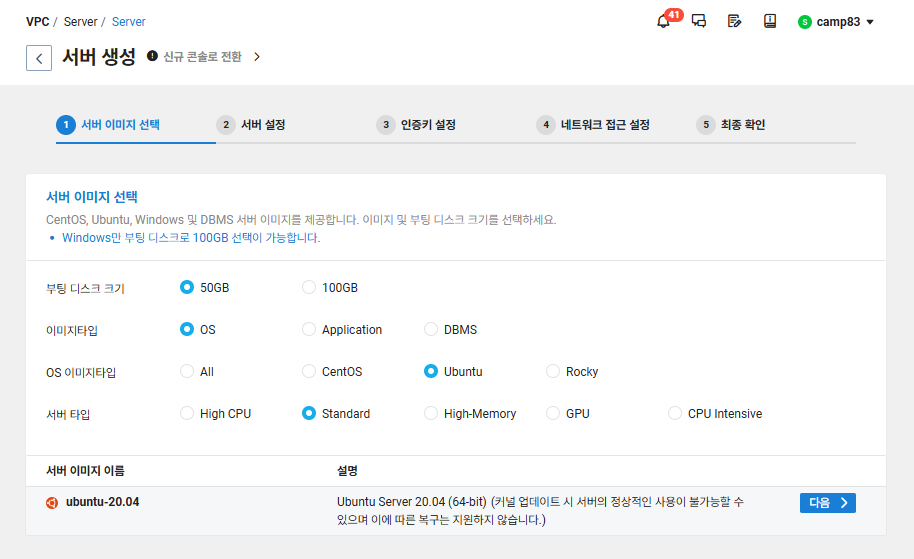
OS 이미지 타입 : Ubuntu
서버 타입 : Standard
2.

VPC : 본인VPC
서버 타입 : [vCPU 4개짜리로 함]
서버이름 : 원하는거
Network Interface IP : 10.0.1.02
3.

인증키 없으면 생성
4.
acg 선택
5.
공인 IP 없으면 생성

서버 : bitcamp-springboot
Network Interface IP : 10.0.1.03
IP랑 서버 이름만 다르게해서 생성
4- 도커 설치 스크립트 다운로드
윈도우 + R
> ssh root@공인IP

> apt-get update
> curl
> curl https://get.docker.com > docker-install.sh
상태 확인
> ls –l
> cat docker-install.sh
> chmod 755 docker-install.sh
-rwxr-xr-x 1 root root 22115 Nov 15 11:49 docker-install.sh
도커 실행
>./docker-install.sh
버전 확인
> docker -v
> apt-get update
> apt install docker.io
에러 발생
> apt install containerd
> apt install docker.io
> docker container
> docker container ls
모두 Y

비밀번호 변경
> passwd
5- build.gradle 설정 변경
//노드 모듈 필요 – npm 사용하려고
plugins{
	id 'com.github.node-gradle.node' version '7.0.0'
}

// React build 설정 — 리액트가 있다는 걸 알려주는 것
def reactAppDir = "${projectDir}/src/main/frontreact"

processResources {
    // task간의 의존성 정의
    // processResources task 실행되기 전에 copyReactFile task를 먼저 실행한다.
    dependsOn "copyReactFile"
}

task copyReactFile(type: Copy) {
    dependsOn "buildReact"
    // from 메서드를 통해 디렉토리의 복사할 파일들을 지정하고, into 메서드를 통해 복사 대상 디렉토리를 설정
    from "$reactAppDir/build"
    into "$projectDir/src/main/resources/static/"
}


// $reactAppDir 디렉토리의 변경 사항을 감지하고, 변경이 있을 경우에만 Task가 실행되도록 할 수 있다.
// 이를 통해 변경 사항이 없는 경우에는 Task가 다시 실행되지 않아 빌드 성능을 향상시킬 수 있다.
// 매번 build 하지 말라고, react 가 변경되었을 때만 하는걸로 설정
task buildReact(type: Exec) {
    dependsOn "installReact"
    workingDir "$reactAppDir"
    inputs.dir "$reactAppDir"
    group = BasePlugin.BUILD_GROUP
    if (System.getProperty('os.name').toLowerCase(Locale.ROOT).contains('windows')) {
        commandLine "npm.cmd", "run-script", "build"
    } else {
        commandLine "npm", "run-script", "build"
    }
}

task installReact(type: Exec) {
    workingDir "$reactAppDir"
    inputs.dir "$reactAppDir"
    group = BasePlugin.BUILD_GROUP
    if (System.getProperty('os.name').toLowerCase(Locale.ROOT).contains('windows')) {
        commandLine "npm.cmd", "audit", "fix"
        commandLine "npm.cmd", "install"
    } else {
        commandLine "npm", "audit", "fix"
        commandLine "npm", "install"
    }
}
6- React 설정 변경
React의 package.json 파일
맨 밑에 추가
	},
	"proxy" : "http://localhost:8080"
}
7- React와 Spring Boot 연결 잘 됐는지 Test
프로젝트 빌드 -> jar 파일이 떨어진다
PS D:\Spring Boot\workspace\NCPSpringBootReactGradle> ./gradlew build
jar 파일 확인
PS D:\Spring Boot\workspace\NCPSpringBootReactGradle > cd build
PS D:\Spring Boot\workspace\NCPSpringBootReactGradle\build > cd libs
파일 확인
PS D:\Spring Boot\workspace\NCPSpringBootReactGradle\build\libs > ls
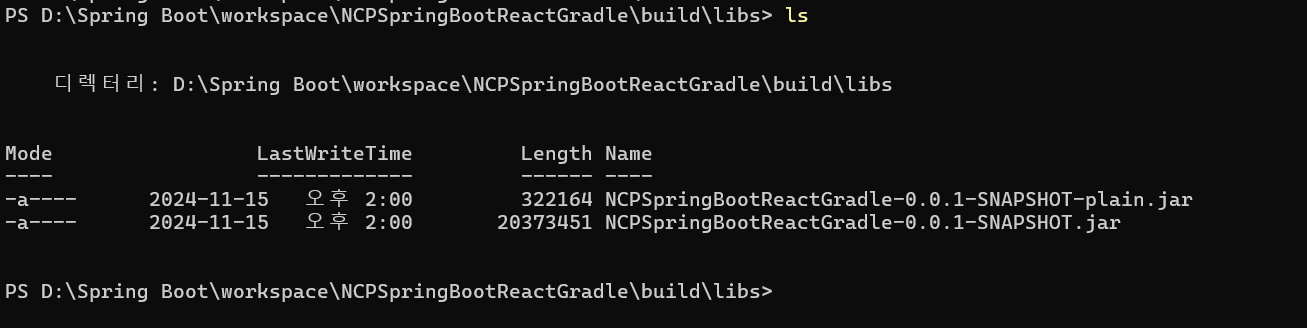
.jar 파일 확인 후 스프링 부트 실행
> java –jar NCPSpringBootReactGradle-0.0.1-SNAPSHOT.jar
* http://localhost:8080/ 하면 떠야됨
'백엔드 > Server' 카테고리의 다른 글
| Jenkins, 프로젝트 Server에 올리기 -3 (1) | 2024.10.25 |
|---|---|
| Jenkins, 프로젝트 Server에 올리기 -2 (0) | 2024.10.25 |
| Jenkins, 프로젝트 Server에 올리기 -1 (0) | 2024.10.23 |


